Instructions for configuring Google Map for website
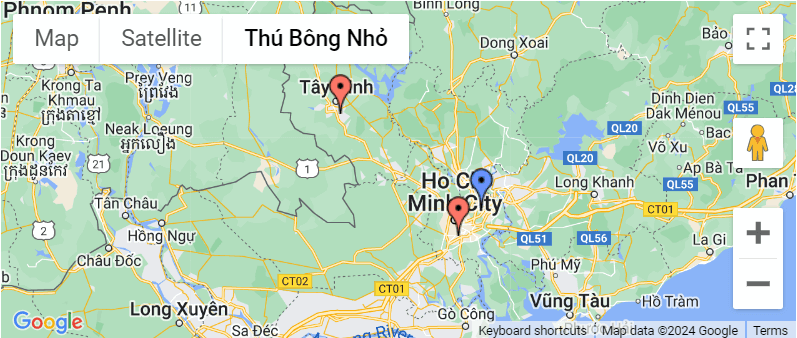
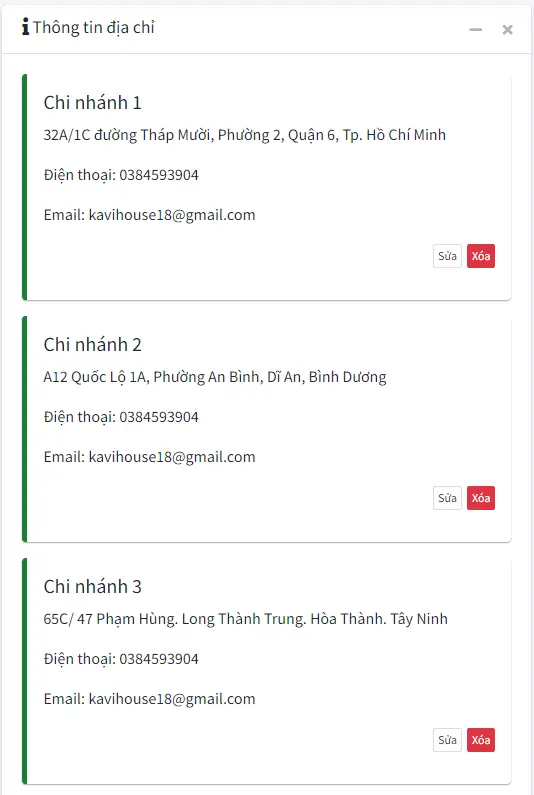
DybiWeb supports 1 address map and multiple address map (for companies or shops with multiple addresses). The GoogleMap module configuration interface is as follows:
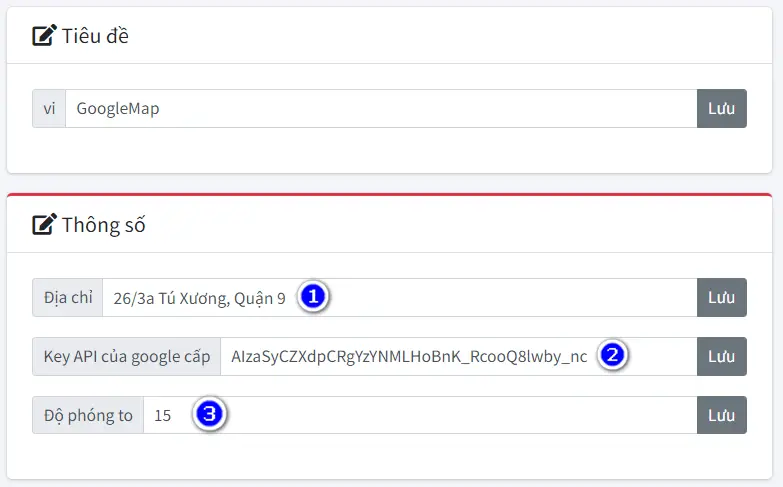
(1): The system will automatically retrieve the address according to the address information you declared in Web information in the website management system. If you only have 1 address, priority will be given to the address you enter in the Address box (1). If you do not enter here, the system will automatically take the first address in Address information .
(3): Zoom level: depending on the distribution density of branches on the map, you choose the appropriate zoom level. If there is only 1 address displayed on the map, a zoom of about 15 is good.
(2): API Key: According to Google's new policy announcement, to use Google Map on websites and apps,... we need to have an Api Key (or Google Maps API) to be able to use Google Maps. To have Google Maps API, perform the following steps:
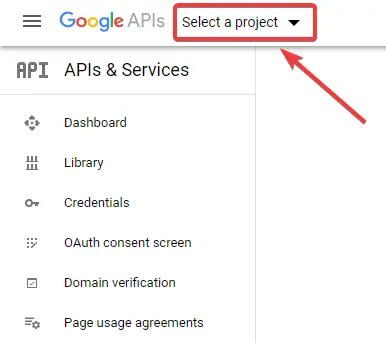
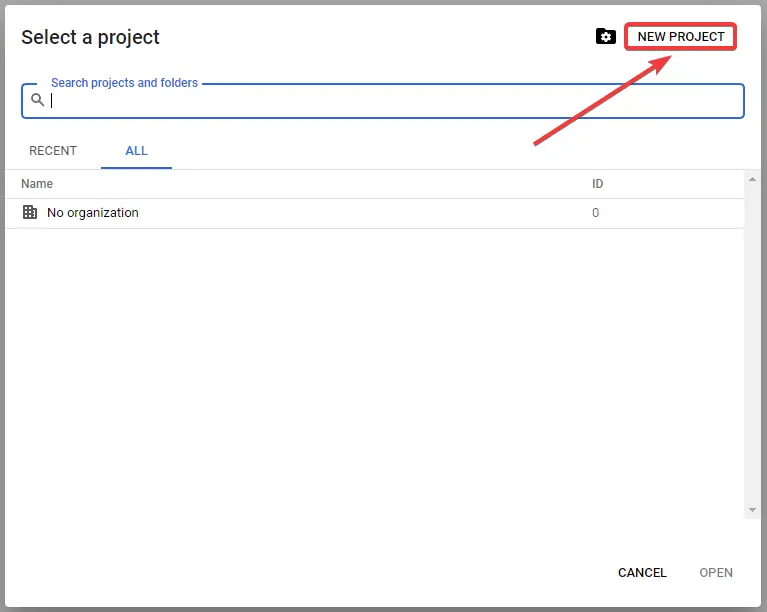
Step 1: Access Google API Console → Select a project ( Note: Each Project can contain many API libraries, each API library can be used for many websites, depending on your settings.)
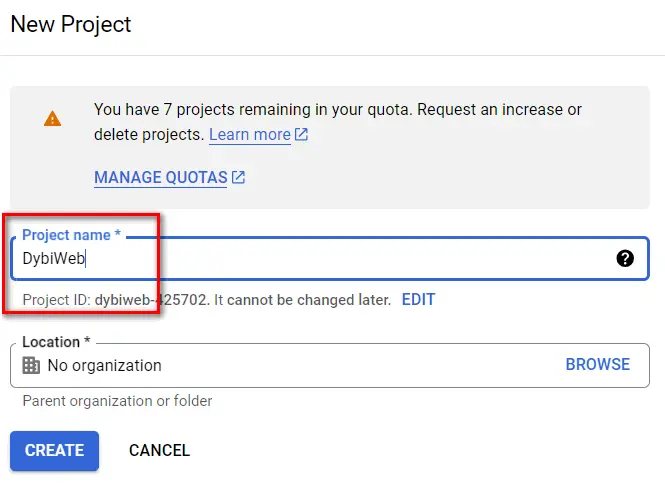
Step 2: Add a new Project
Step 3: Fill in all information → Create
Step 4: After creating → The project you just created → APIs & Servives → Credentials
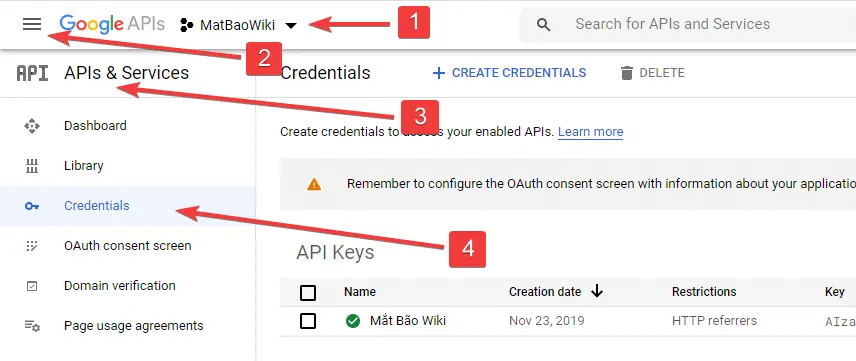
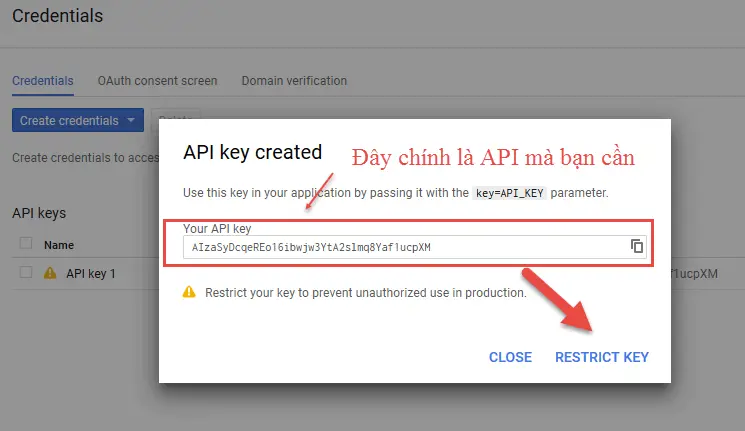
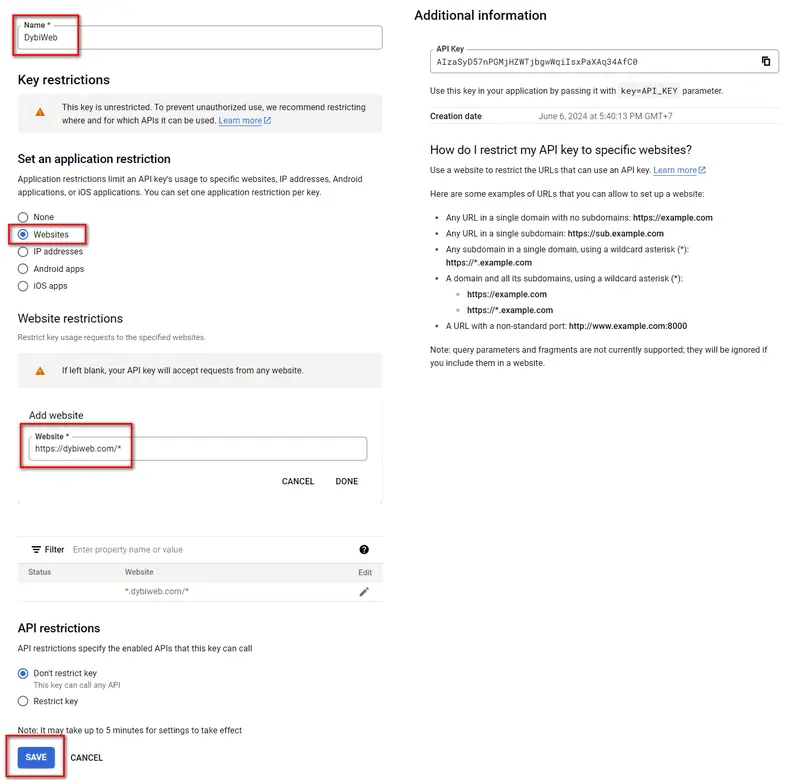
Step 5: Here → CREATE CREDENTITALS → copy Your API Key to use → Restrict Key to continue installation.
Step 6: Finally, go to edit api and edit the name information to make it easier to remember and increase security

Fill in information according to the following instructions:
- Name: Name the API for easy future management
- Application restrictions: Http referrers (web sites)
- Website restrictions Enter the following two values
- *.your-domain.com/* (Example: *.dybiweb.com/*)
- https://your-domain.com/* (Example: https://dybiweb.com/*)
- API restrictions: Don't restrict key
- Save: Save API settings
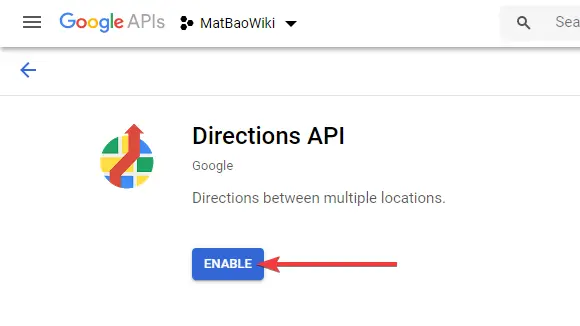
Step 7: This step is quite important.
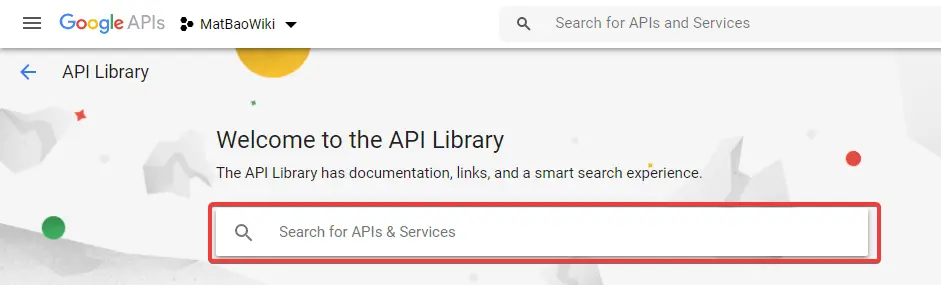
Go to the Project you just created → APIs & Servives → Library
Import the following Libraries → Enable :
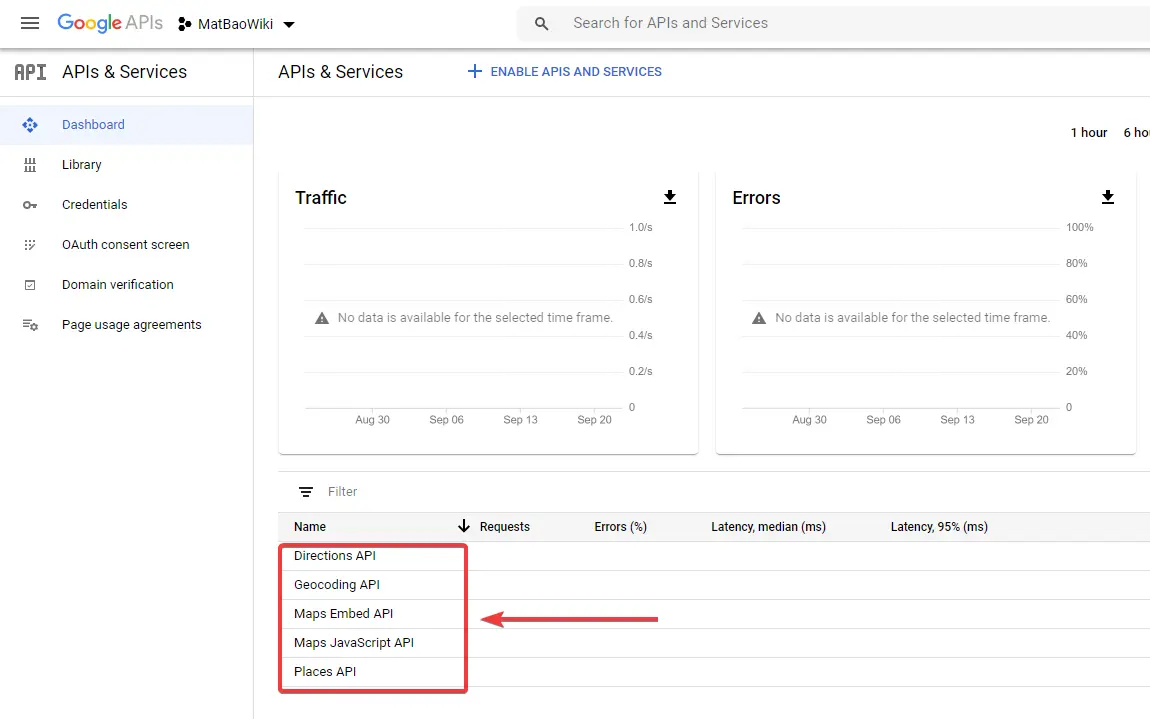
- Maps JavaScript API
- Directions API
- Maps Embed API
- Geocoding API
- Places API
Step 8: After Enable is completed → Dashboard to check the successfully installed libraries.
Thus, we have completed the Google Maps API initialization process.
Now update the Key in Step 5 into the module and you're done.